Cost centres, projects and budgets
Book income and expenses to a branch, department or project, see profit and loss for each one, and compare a monthly budget with what actually happened.
Cost centres let you see where money is made and spent: tag income and expense lines with a branch, department or project, then read a profit and loss for each one and compare it with a budget.
Before you start: creating cost centres, booking entries to them and saving budgets needs the Accounting permission Can post entries. Reading the reports needs Can view.
Add a cost centre
- Open Accounting → Cost centres.
- Choose New cost centre.
- Type a Name, for example Pune branch or Tower B.
- Optionally type a Category to group similar ones, for example Branches or Projects. A project is simply a cost centre in a Projects category.
- Choose Save.
To stop using one, choose Edit, turn on Archived — hide from pickers and save. Archived cost centres keep everything already booked to them; turn on Show archived to see them again.
Book a journal entry to a cost centre
- Open Accounting and choose Post entry.
- Pick an income or expense account on a line. A cost centre picker appears under that line.
- Choose the cost centre, or leave it on No cost centre.
- Finish the entry and choose Post entry.
Each line takes its own cost centre, so one entry can split rent across two branches by using two expense lines.
Book an invoice or bill to a cost centre
- In Invoices & Payments, open a draft invoice, bill or other document.
- In the header, pick a Cost centre.
- Issue the document as usual. Its income (or, for a bill, its expense) is booked to that cost centre.
A credit note made from an invoice keeps the invoice's cost centre.
See profit and loss by cost centre
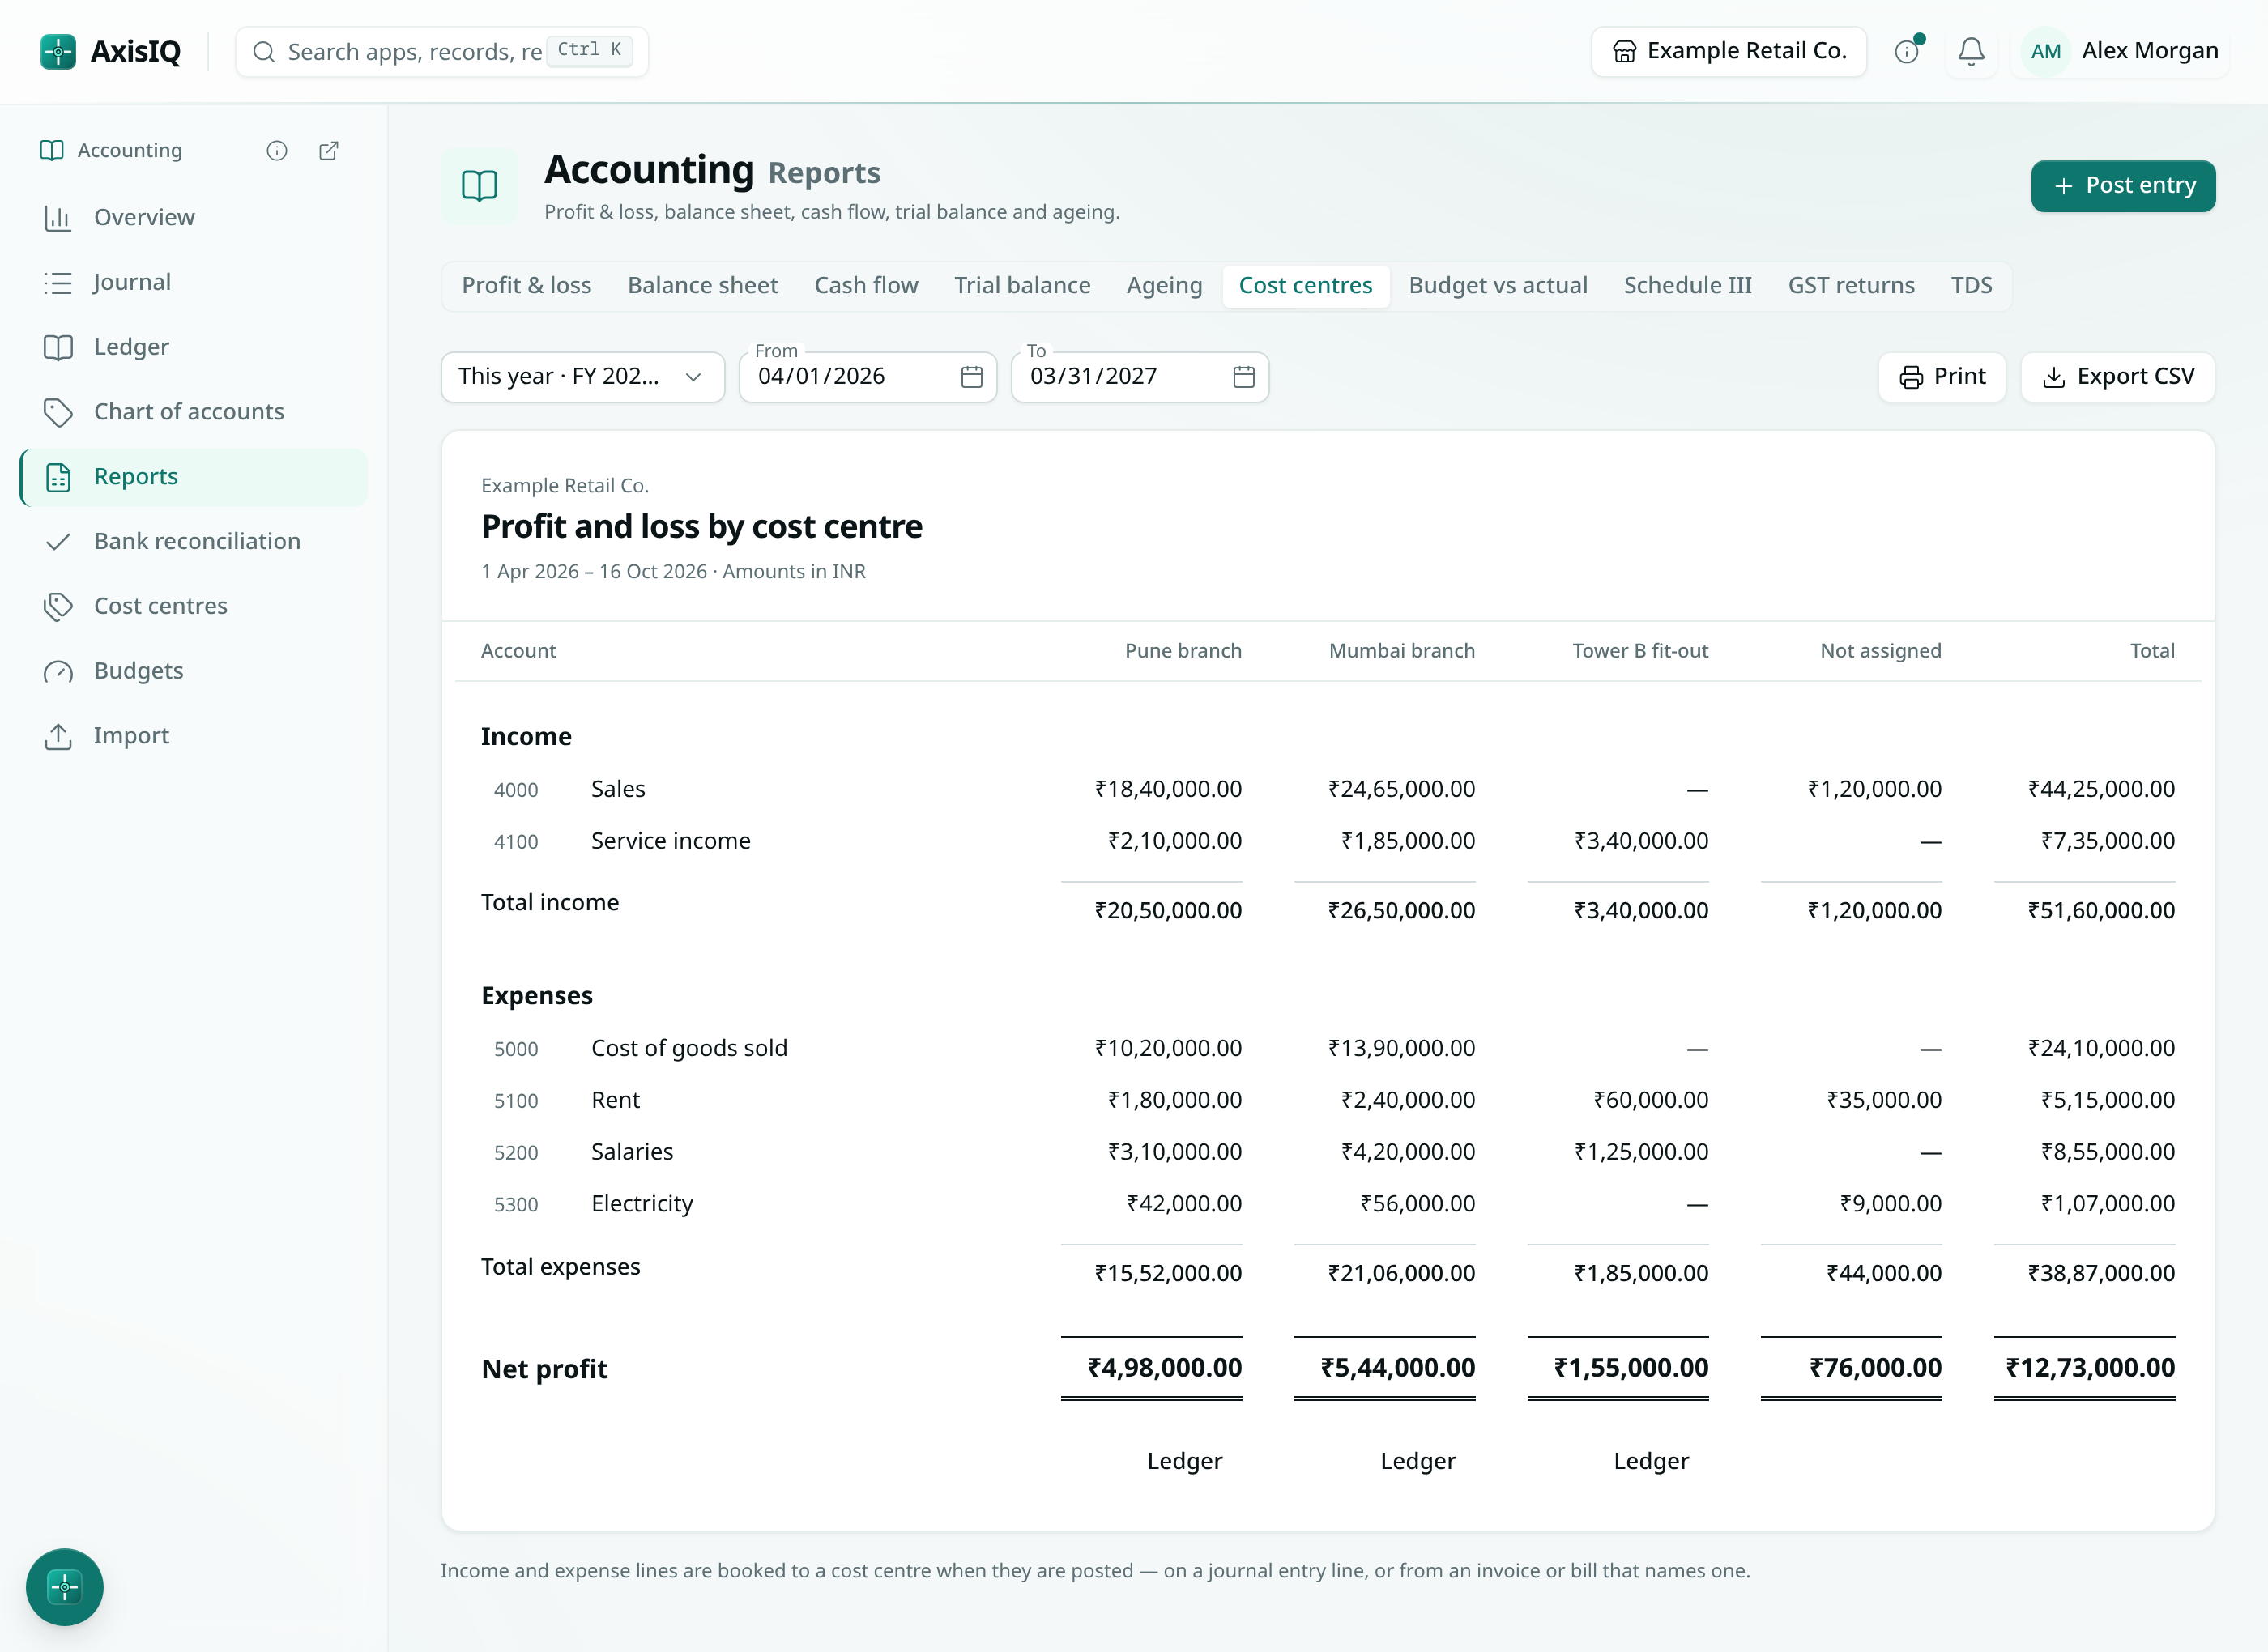
- Open Accounting → Reports and choose Cost centres.
- Pick the period and, if you keep books in more than one currency, the currency.
- Each cost centre gets its own column, with Not assigned for lines that name none, and a Total column that matches your ordinary profit and loss.
- Choose Ledger under a column to see every line booked to that cost centre, with a running net. Choose a line to open its journal entry.
Use Export to download the report as a CSV file.
Set a budget
- Open Accounting → Budgets.
- Pick the Financial year and, under Budget for, either Whole business or one cost centre.
- Type the planned amount for each income and expense account, month by month. The arrow at the end of a row copies the first month into every month.
- Choose Save budget.
Compare budget with actual
- Open Accounting → Reports and choose Budget vs actual.
- Pick the Financial year, the months (From and To) and the scope under Budget for.
- Each account shows the budget, the actual amount from your books, the variance and the variance as a percentage. A variance is green when it helps profit (more income or less expense than planned) and red when it hurts.
Good to know
- A journal line can be booked to one cost centre. To split an amount, use one line per cost centre.
- The cost centre is set when an entry is posted and never changes afterwards. To move an amount, reverse the entry and post it again. A reversal keeps the original line's cost centre.
- Payments you receive or make are not booked to a cost centre; the invoice or bill they settle is.
- Cost centres can't be deleted, only archived, because posted lines point at them.
- Budgets are plans, not postings: saving one never changes your books, and a locked period doesn't stop you editing a budget.
- Saving a budget replaces that year's budget for the chosen scope and currency in full.
- A cost centre's budget is compared only with what is booked to that cost centre. The whole-business budget is compared with everything.
- Each report shows one currency at a time.