Protect sheets and ranges
Stop teammates changing approved figures, headers or whole sheets by mistake — choose who can still edit, and whether others are blocked or just warned.
Protection keeps the cells that matter safe while everyone else keeps working. Protect a range such as a header row, a column of approved prices or a block of totals, or protect a whole sheet. Workbook managers can always edit protected cells; you can name other people who may edit them too.
Before you start: adding, changing or removing a protection needs Full control of Sheets on the Roles page. Anyone who can view the workbook can see what is protected and who can edit it.
Protect a range
- Open the workbook from Sheets and select the cells you want to protect.
- Right-click the selection and choose Protect range…. To protect a whole column, right-click its letter and choose Protect column….
- In the Protect window, check that A range is chosen and look at the Cells field. You can type a range like B2:D20, whole columns like B:C, or whole rows like 3:5.
- Add a Description so people know why it is protected, for example "Approved budget".
- Under Who can still edit, choose Only workbook managers, or Workbook managers and people I choose and pick the people.
- Choose what happens when anyone else edits: Block the change or Warn first.
- Click Protect.
Protect a whole sheet
- Right-click the sheet's tab at the bottom of the workbook (or click its ⋯ button) and choose Protect sheet….
- Pick who can still edit and Block the change or Warn first, then click Protect.
A protected sheet shows a lock on its tab. Besides its cells, people who can't edit it also can't add, delete or sort rows and columns, change column or sheet settings, rename the sheet or delete it.
What other people see
- Cells they can't edit are lightly shaded. Hover a cell to see which protection covers it, and the bar at the bottom of the grid names the protection on the selected cell.
- With Block the change, their edit is not saved and a message tells them the cells are protected.
- With Warn first, they are asked to confirm. Choosing Change anyway saves the edit.
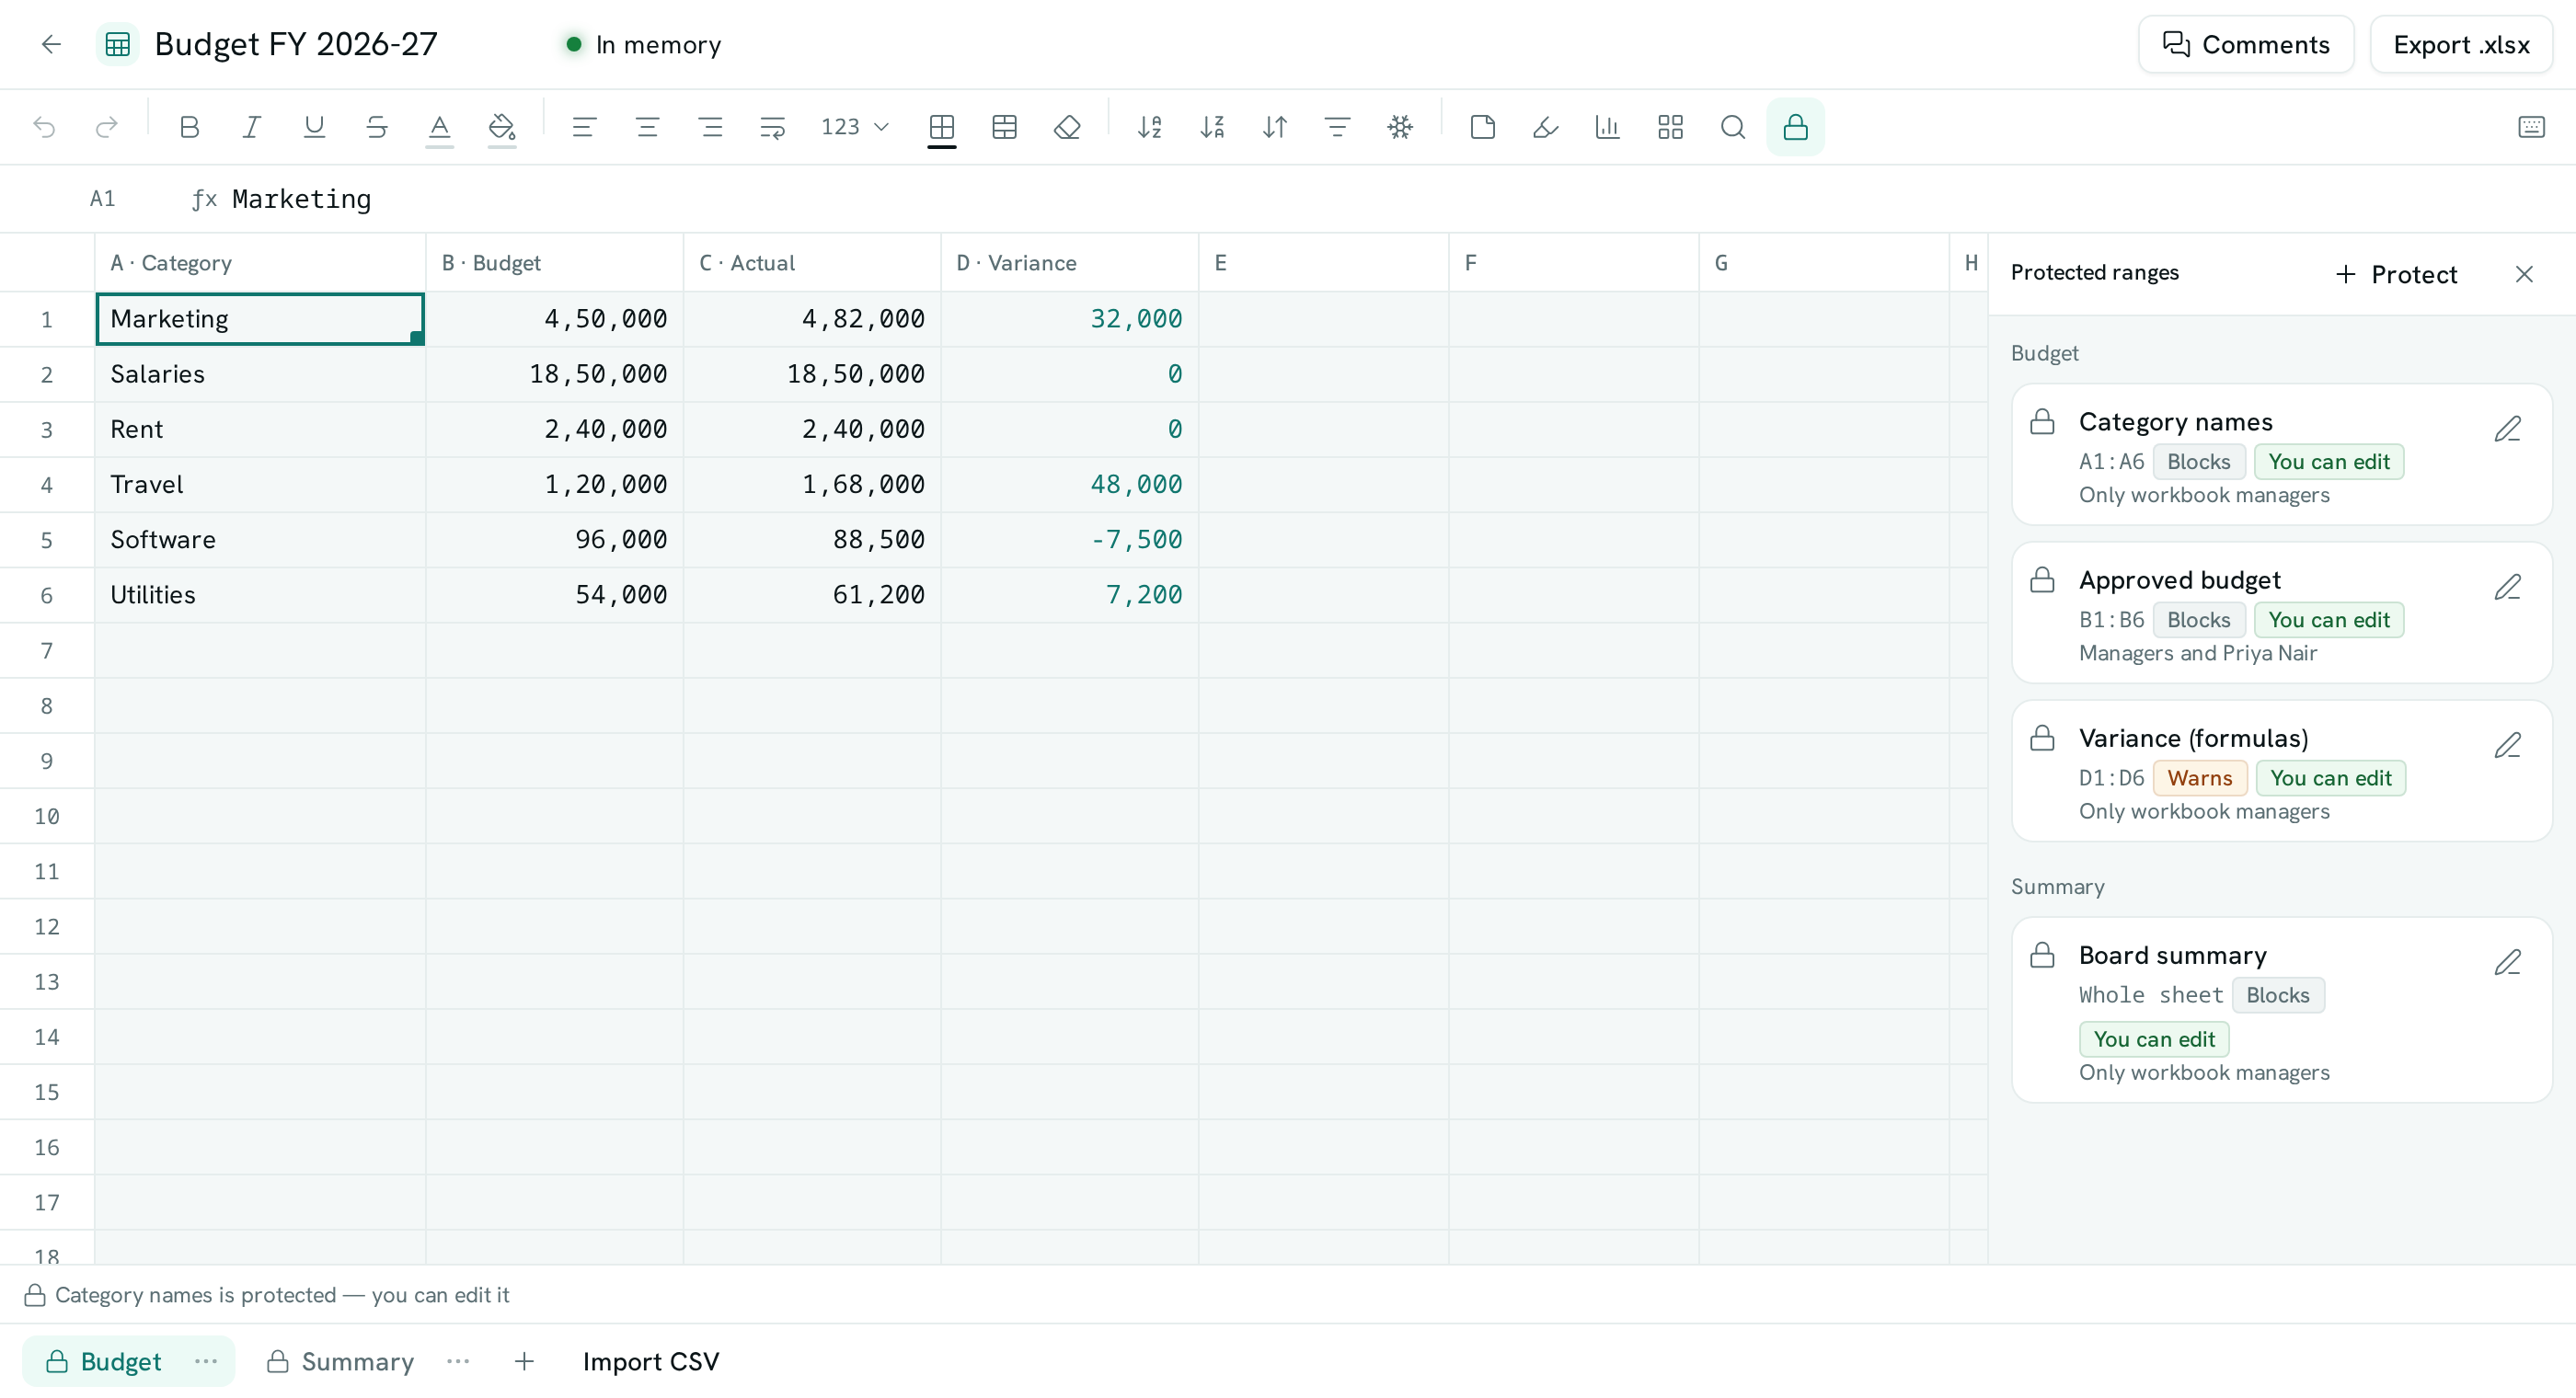
See and change protections
- Click Protected ranges (the lock) in the toolbar. Protect in the same panel adds a new one. The panel lists every protection in the workbook, grouped by sheet, with who can edit it and whether it blocks or warns.
- Click a protection's name to jump to its cells.
- To change one, click the pencil beside it, update the settings and click Save. To remove it, open the same window and click Remove protection.
Good to know
- Protection applies everywhere the workbook can be edited, not just this screen — pasting, filling, find and replace, sorting, pivot tables, Ask Axis and records linked to the sheet all respect it.
- Formatting and notes count as edits, so protected cells keep their look too.
- Protected ranges move with your data: inserting rows above a range moves it down, and inserting rows inside it makes it bigger. People who can't edit a range can't delete its rows or columns, or insert rows or columns through the middle of it.
- On a sheet linked to records, updates made to the records themselves still appear in the sheet, even in protected cells.
- Copies of a sheet or workbook keep their protections.
- Protection is about preventing mistakes by people who can already edit the workbook. To stop someone seeing or editing a workbook at all, change their role in Team & Permissions.