Shifts, rosters and overtime
Plan who works which shift each week, publish the roster to your team, and pay approved overtime through payroll.
Set up the shifts your business runs, including night shifts that end the next morning. Plan each week's roster, publish it so everyone sees their shifts, and let people claim overtime. Approved overtime is paid with their next salary.
Before you start: creating shifts, editing the roster and setting the overtime rules needs Runs HR on People (HR) on the Roles page. Setting how overtime is paid needs Full control. Everyone can see their own shifts and claim their own overtime.
Create your shifts
- Open People → Shifts.
- Under Shift templates, click Add shift.
- Enter a Name (for example "Morning" or "Night") and pick a Colour.
- Set Starts and Ends. A shift that ends before it starts, like 22:00 to 06:00, ends the next morning.
- Enter the Unpaid break (minutes), Late after (grace, minutes), and Early if leaving more than (minutes).
- Leave Full day and Half day at 0 to use the shift length, or enter how many minutes count as a full day and a half day.
- Click Save.
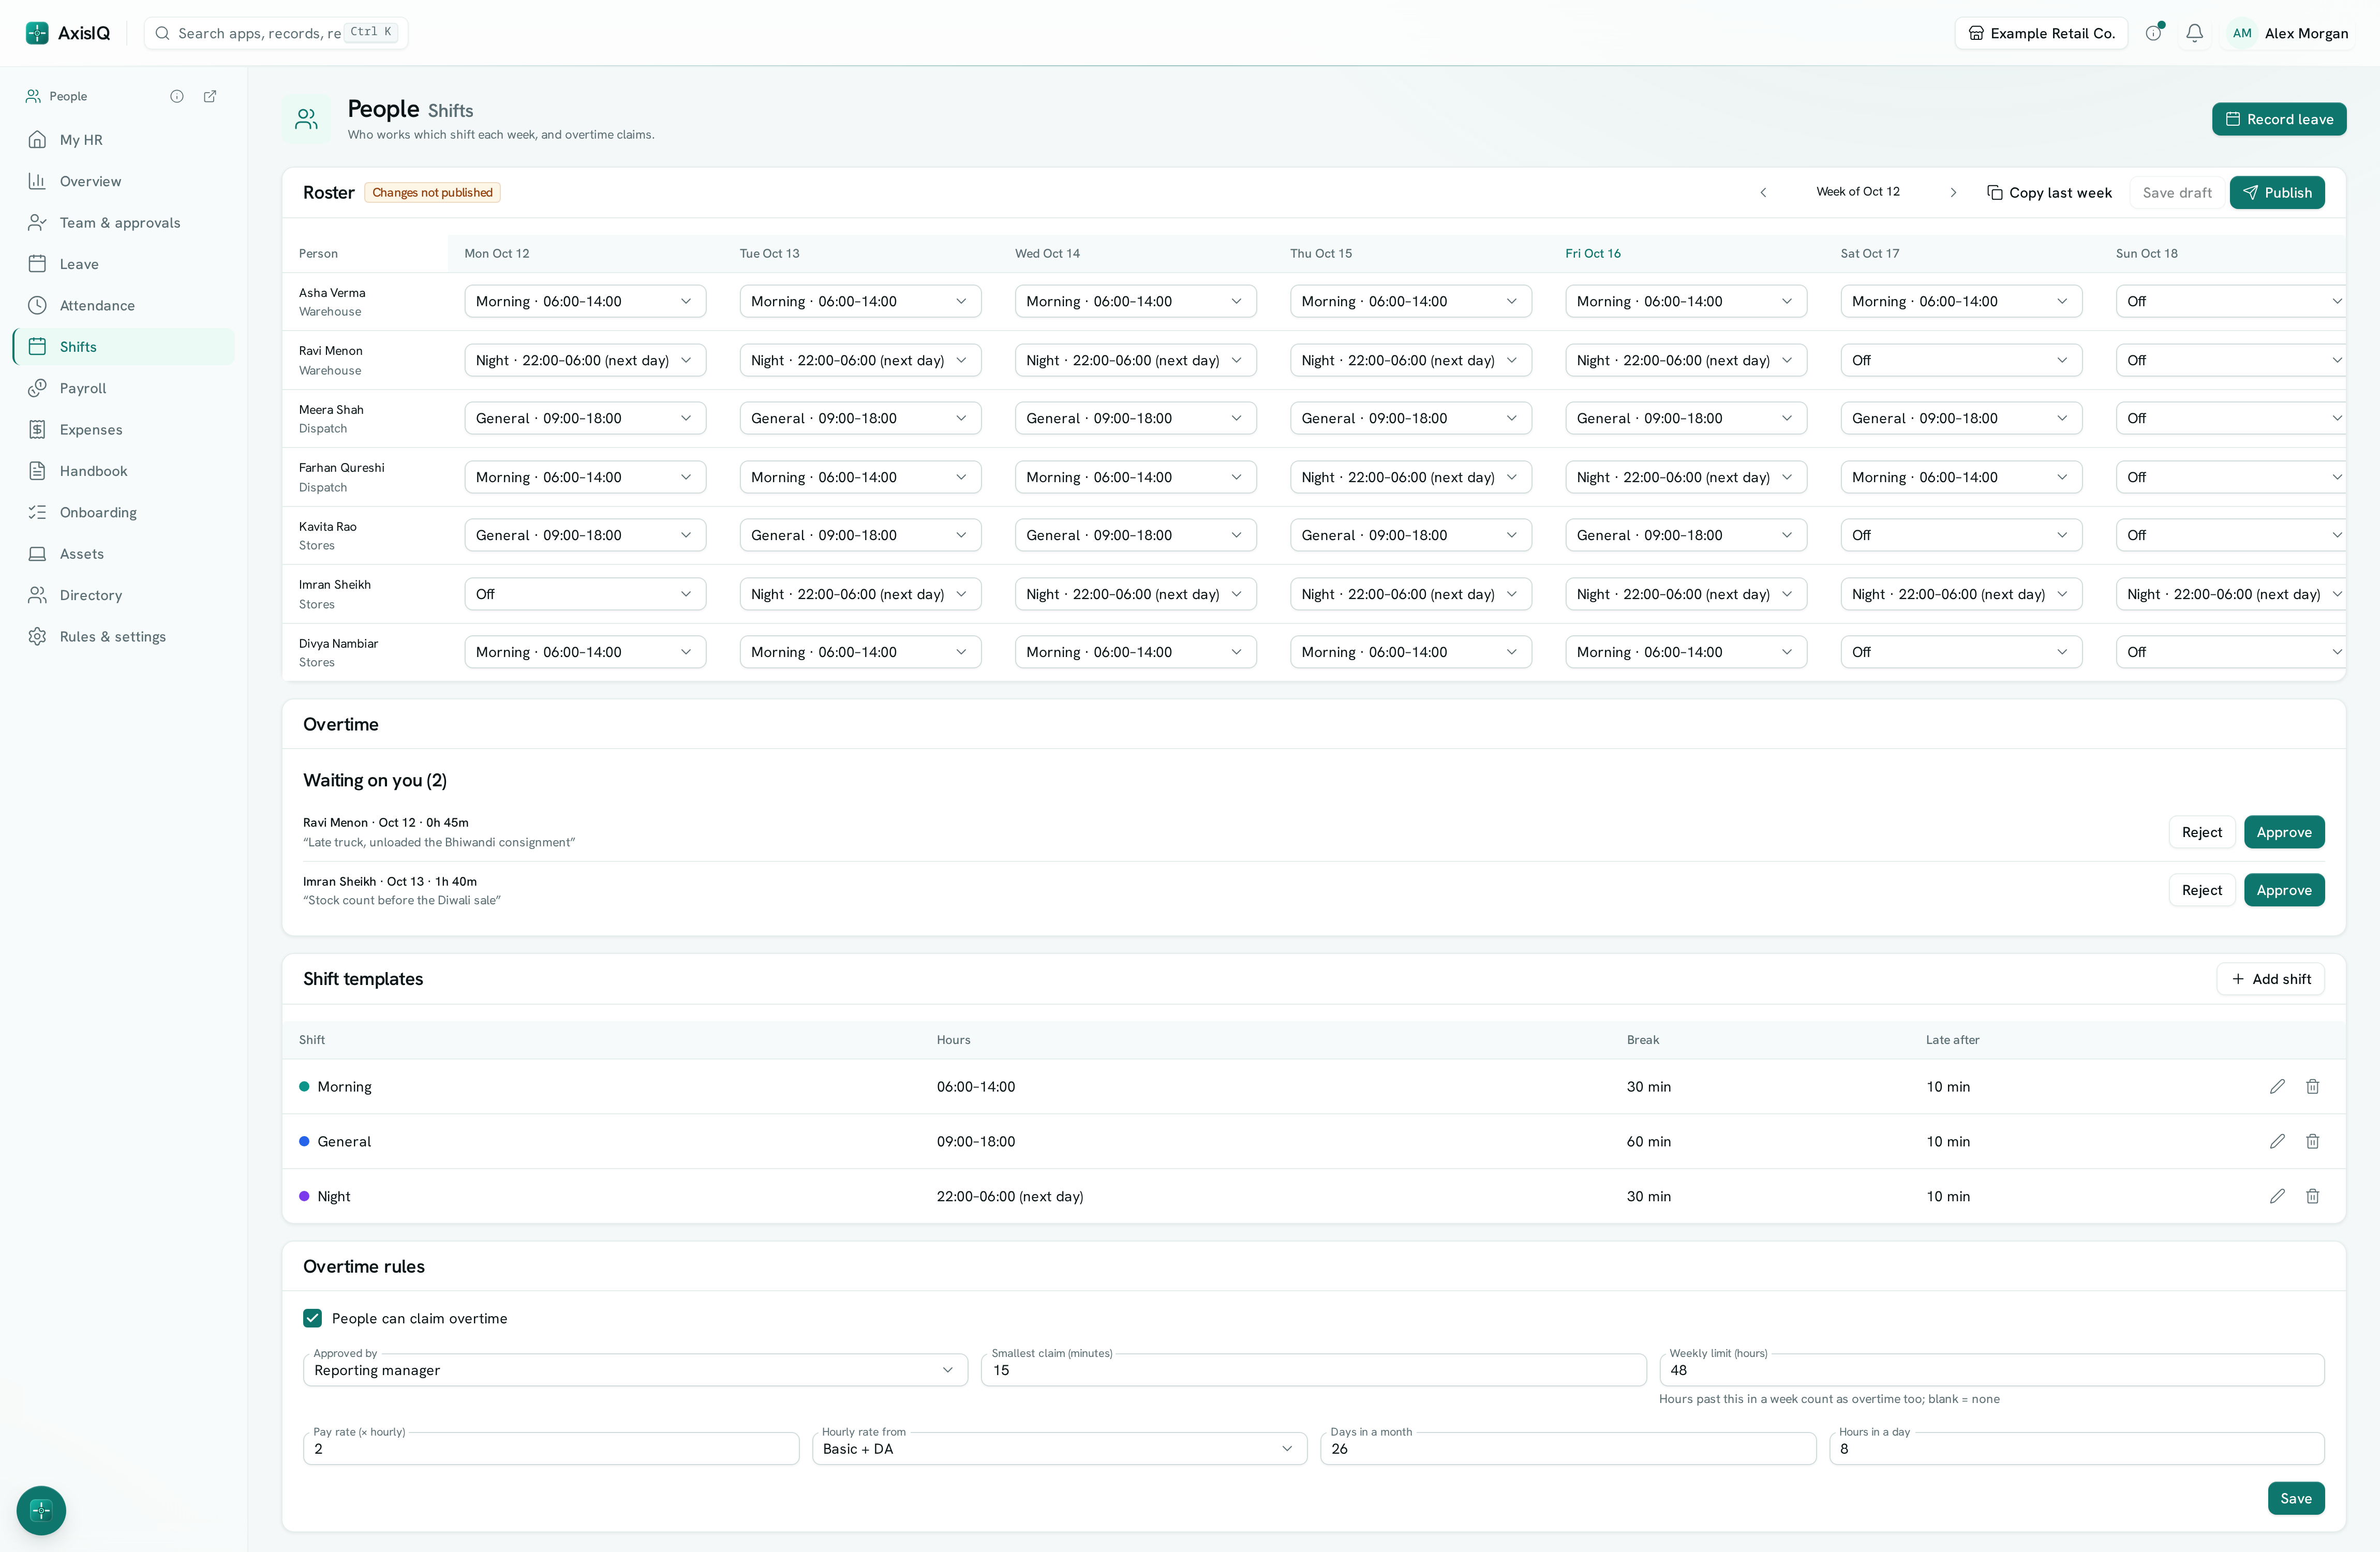
Plan and publish the week
- In People → Shifts, use the arrows next to Week of to pick the week.
- In the Roster, choose a shift for each person and day. Pick Off for a day off. Leave Usual hours to keep their normal work schedule.
- To start from last week, click Copy last week. This replaces the week's draft.
- Click Save draft to keep your changes without telling anyone.
- Click Publish when the week is ready. Everyone whose shifts are new or changed gets a notification.
Each person can see their published shifts under My shifts on the same page. Managers can see their team's roster.
Claim overtime
- Open People → Shifts.
- Under Overtime, click Claim overtime.
- Pick the Day (the shift's start date) and answer What was the extra time for?.
- Click Claim.
You don't enter the hours yourself. People works them out from your check-in and check-out: time worked past the end of your shift, all the time you worked on a day off, and any hours over the weekly limit if your company has set one. The claim then goes to your approver.
Approve overtime
- Open People → Team & approvals (look under Overtime), or People → Shifts → Overtime → Waiting on you.
- Click Approve or Reject. Add a reason if you reject a claim.
Set the overtime rules
- Open People → Shifts and scroll to Overtime rules.
- Tick People can claim overtime.
- Choose who it is Approved by, the Smallest claim (minutes), and an optional Weekly limit (hours).
- If you have Full control, set the Pay rate (× hourly), whether Hourly rate from is Basic + DA or Gross pay, and the Days in a month and Hours in a day it divides by. The default pays twice the hourly rate (basic + DA ÷ 26 days ÷ 8 hours).
- Click Save.
Good to know
- Attendance is checked against the published roster. A draft changes nothing until you publish it.
- A night shift counts as one day, the day it started. If someone checks in at 21:55 on Monday and checks out at 06:40 on Tuesday, that's 8h 45m on Monday.
- If someone is rostered on a public holiday, it's a working day for them.
- A person can only make one overtime claim per day. Nobody can approve their own claim.
- Approved overtime is added to the next payroll run as an overtime line, and it's paid only once. Overtime approved after a month's payroll is finalized goes into the next month.
- Overtime is taxable in the month it's paid. It doesn't increase the tax estimate for the rest of the year.
- Leave days are still counted from each person's work schedule, not from the roster.
- A full and final settlement doesn't include unpaid overtime. Add it as an Other line on the settlement.