Take payment when a form is submitted
Charge people for a registration, ticket or order right when they submit your form, through your own payment account.
Turn any published form into a paid registration, ticket booking or order form: people fill it in, pay on a secure page, and the response is complete once the money arrives.
Before you start: you need Full control on the Forms app and Can collect (or higher) under Collecting payments on the Roles page. Your workspace also needs a payment account connected in Invoices & Payments › Connections — see Connect a payment account.
Set a price
- Open Forms and open the form.
- Go to the Settings tab and find Payment on submit.
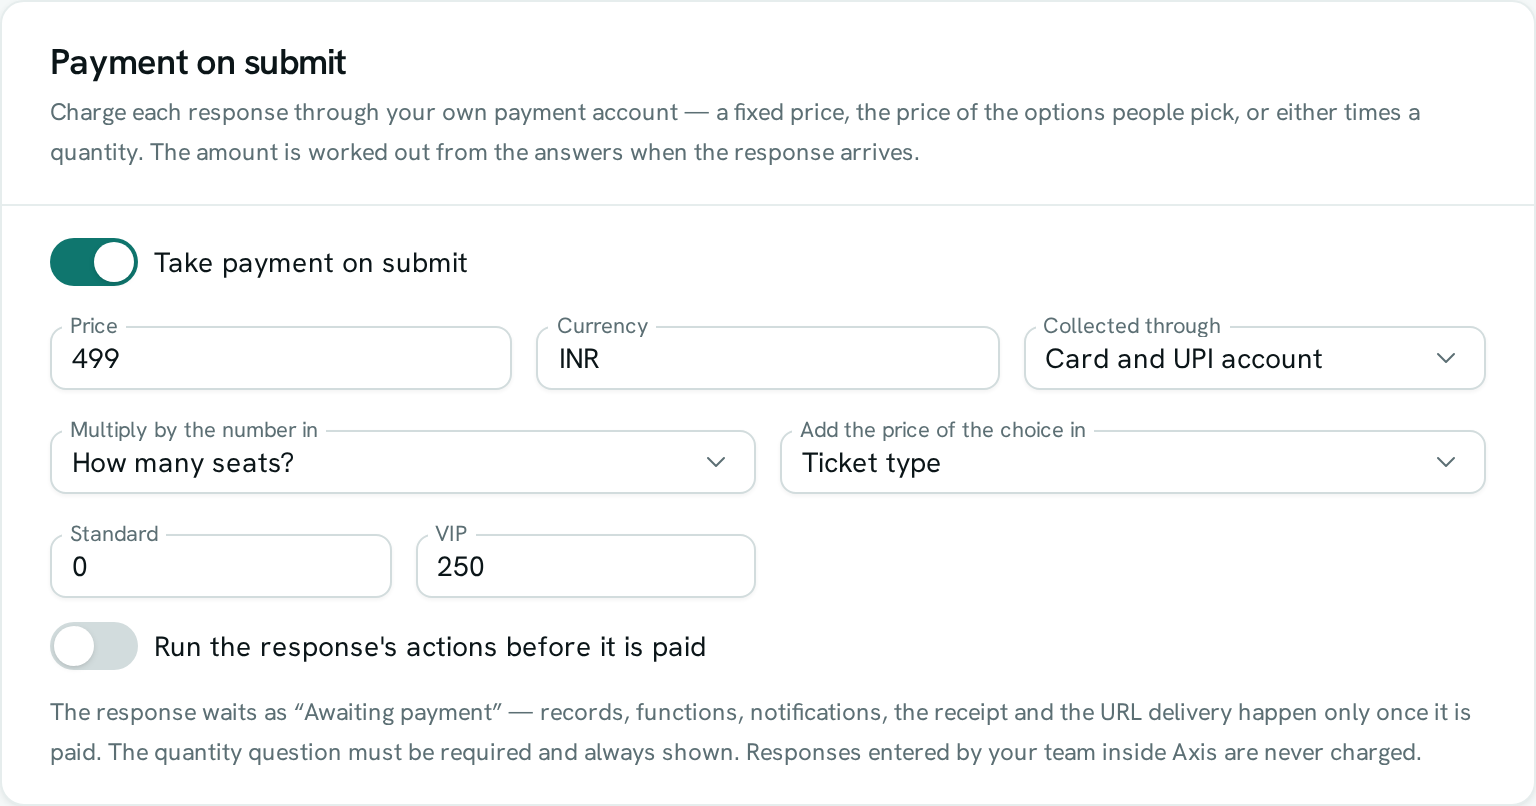
- Switch on Take payment on submit.
- In Collected through, choose the payment account the money goes into.
- Set the price:
- Price — a fixed amount, for example
499. - Multiply by the number in — pick a number question (such as "How many tickets?") to charge the price once per unit.
- Add the price of the choice in — pick a choice question, then type a price next to each option (for example Standard
0, VIP250). Options left blank cost nothing extra.
- Price — a fixed amount, for example
- Leave Currency blank to use your workspace currency, or type a 3-letter code such as
INR. - Click Save.
The total is worked out from the answers when the response arrives: (price + chosen options) × quantity. A response that comes to zero needs no payment and is handled like any other.
What respondents see
A note on the form tells them they will be taken to a secure page to pay. After they press submit they land on that page, and when they finish paying they return to a thank-you screen on your form that says the response is complete once the payment is confirmed.
What happens to the response
Every response is saved the moment it is submitted, with the status Awaiting payment and the payment badge Unpaid. By default, nothing else happens until it is paid. Once the payment arrives the badge turns Paid and the response goes on:
- the record is created (if the form creates records),
- the function runs (if one is set),
- your teammates are notified, the respondent's receipt is sent, and the response is sent to your URL (if set up).
Want those to happen immediately instead? Switch on Run the response's actions before it is paid. The response then shows its usual status straight away, with Unpaid beside it until the money lands and Paid after.
In the Responses tab, every charged response shows a badge with its payment status and amount, for example Paid · INR 1498.00. Pick Awaiting payment under Any status to see who hasn't paid.
Good to know
- Only people filling in the shared form link are charged. Responses your team enters from inside Axis are never charged.
- The quantity question must be required and always shown, so the total can always be worked out.
- If someone leaves the payment page without paying, their response stays Awaiting payment and still counts toward the form's response limit. You can delete it from Responses.
- If the payment page can't be opened (for example, your payment account was disconnected), the respondent is asked to try again in a moment, and the stored response is marked Failed with the badge Payment not started. It can't be retried.
- The form page doesn't show a running total — the respondent sees the exact amount on the payment page.
- Refunds are made from Invoices & Payments › Payment links, not from the form.
- If the form sends a receipt, the address typed in the receipt question is pre-filled on the payment page.